In this chapter we will make some important installations. We will use these modules and softwares in the upcoming chapters. I am assuming that you are beginner and so we will start with python installation.
Installing python
On windows
I think it is better if I will add images corresponding to the steps so that it will be easy for you.
Go to www.python.org/downloads/ and click Download Python 2.7.x.
 |
| Python.org downloads downloading installer |
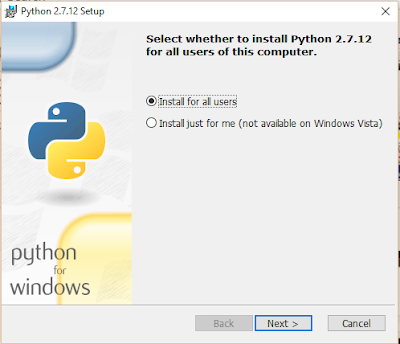
Double click on the file which has been downloaded and you should see a window similar to the following:
 |
| Python installation window 1 |
Hit Next and you will see the following:
 |
| Python installation window 2 |
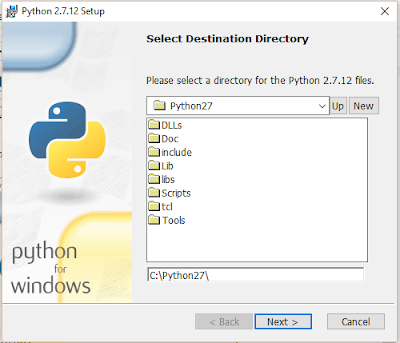
Hit Next again. Please don't change any path if you want to complete your installation without any fuss. Now you will see the following screen:
 |
| Python installation window 3 |
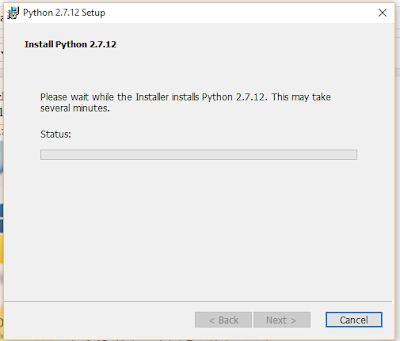
Hit Next again and you should see the following:
 |
| Python installation window 4 |
Let the installer install all the files and once done click on the Finish button and you will exit the installer.Thats it you have installed python on your computer. But you just have to follow one more step, so that you can use python from your command line.
Go to My computer > System properties > Advanced system properties.
 |
| Advanced system properties |
C:\Python27.To check if that is working, open command prompt and type python in it. You should see something similar to the following image:
 |
| Command Prompt Python |
If you get a similar image then you are good to go. If you don't get the same image then you have to check your installation process. If you still aren't able to install python completely(including command prompt), then comment in the comment box below and I will be glad to help you.
If you are using Mac then you can see the installation from here: Using Python from Macintosh
For Linux python is already installed and just open your terminal to check if python is properly installed on your computer.
Installing SqliteBrowser
We will be using SQLite database for our project. But according to me, if I am developing an app using some database, then it will be good if I can see the data changes in the database for each and every execution. For this reason here comes SQLite browser with which you can open a database and see the data. Lets download and install the software. I will be showing you the steps for installing it on windows. For other OS there are a lot of forums which can guide you through the steps. If you are having trouble installing the software at any point comment in the comment box and I will help you.
Go to http://sqlitebrowser.org/, to the right side you will see downloads and download the file based on your system configuration. Open the file once complete.
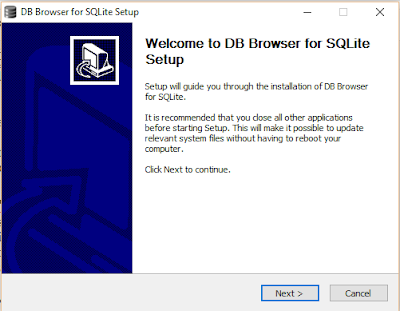
Click on Next >
Go to http://sqlitebrowser.org/, to the right side you will see downloads and download the file based on your system configuration. Open the file once complete.
 |
| SQLite browser installation 1 |
 |
| SQLite browser installation 2 |
Click on I Agree
Click on Next >
 |
| SQLite browser installation 6 |
And there you go. You have successfully installed SQLite browser. In the next section we will install the required modules.
Installing Required modules
Now we will start installing important python modules which we will be using along this course. Please remember that you can also use Virtualenv to install the modules(Completely optional). If you are interested in installing using virtualenv then you can open the documentation and proceed.
You can install all the modules by using pip. You can also use easy_install if you want to.
$ pip install flask
$ pip install flask-sqlalchemy
$ pip install flask-bootstrap
$ pip install flask-wtf
$ pip install hashids
With this all the required modules are installed. Please note that we may are may not use all of the modules but if there are any additional modules that are to be installed, then I will include them in the code when we will encounter the same.
I have tried my level best to make this chapter as simple as possible. If you have felt that this chapter is little bit tough, then don't worry upcoming are very easy. Only the installation part is little bit difficult. Coding is actually fun.
If you want you can download the requirements.txt file of the above modules from requirements.txt . But there modules may be outdated at the time of your reading.
If you didn't understand anything or have any doubt then comment in the comment box below and I will be glad to help you.
If you have any suggestions or feedback then you can comment in the comment box below and I will be very happy to see your message.
You can also contact me.
Thank you. Have a nice day😃.


